What Is Sunken Area Waterproofing?
 Jun , 2025
- Berger Speaks
- 4 Min Read
In construction, a sunken area refers to a floor that sits slightly lower than the rooms around it. These lowered sections are usually found in bathrooms, utility corners, or balconies, where water needs to collect and drain easily. However, because of their depth and function, they're often exposed to constant moisture. Sunken area waterproofing is the process used to protect these zones from water leakage or seepage.
It involves sealing the slab and surrounding surfaces using a combination of waterproofing products and methods. The goal is to stop water from moving beyond the intended space and damaging adjacent areas. Read on to know more about sunken area waterproofing.
Why Sunken Areas Are Prone To Water Damage?
Toilets, kitchens, and bathrooms are areas that are regularly exposed. There is no other part of a home that handles as much water as these places. The subsequent impact of water over time predisposes these spots. Sunken areas face a higher risk of damage for a few reasons:
- These areas are designed to hold and drain water, which increases surface moisture.
- Continuous use of water leads to wet surfaces, especially around plumbing lines and drains.
- Lack of proper slope or drainage can cause water accumulation in corners.
- Small cracks or construction joints in the concrete slab can allow water to penetrate and spread to lower levels.
Due to these reasons, applying a reliable waterproofing for toilets sunken slab system is essential to ensure long-term protection.
Common Problems Caused By Poor Sunken Area Waterproofing
When sunken waterproofing is ignored or done incorrectly, a range of issues may start to appear. These problems not only affect the appearance of the space but can also damage the building's structure and require bathroom waterproofing over time. Some of the common issues include:
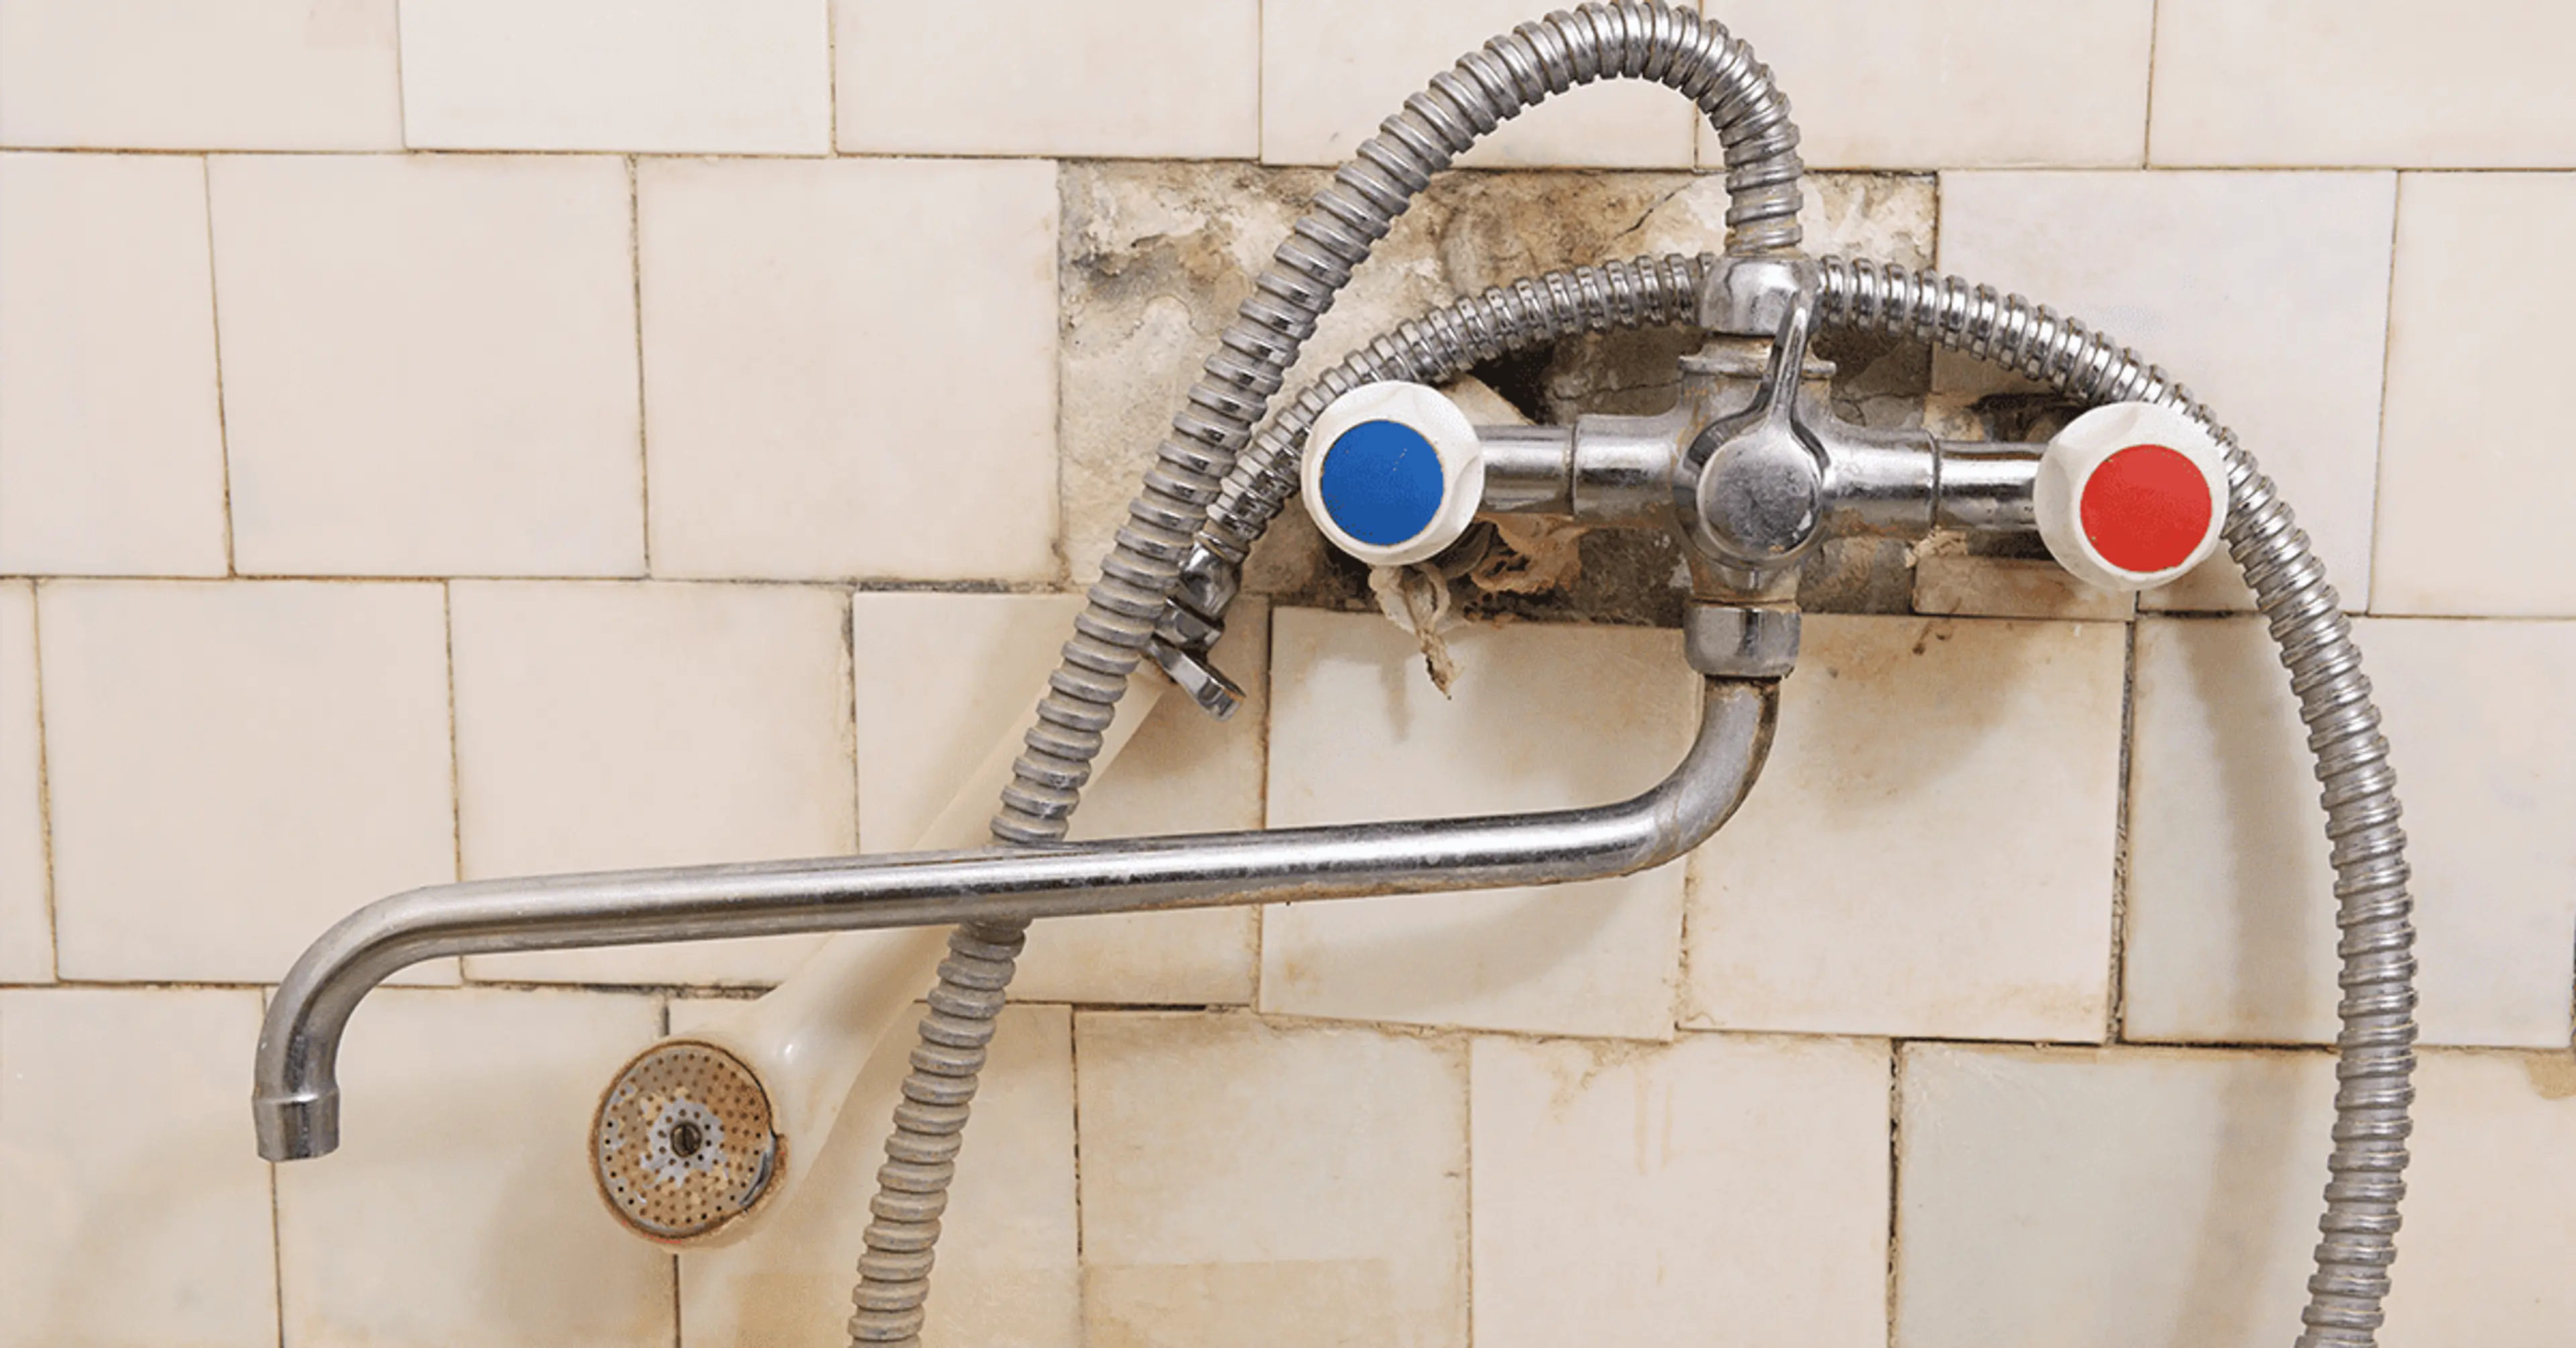
- Water stains on walls and ceilings: When water escapes from the sunken slab and seeps into surrounding walls or the ceiling of the floor below, it often leaves behind visible marks. These stains usually appear as yellow, brown, or grey patches. Over time, they become larger and darker, showing exactly where the moisture is trapped. While it may start as a cosmetic problem, .
- Damp patches on the floor or nearby rooms: You may notice certain areas on the floor that always feel slightly wet or look darker than others. Even if you clean and dry them, the moisture tends to return. This happens when the waterproofing layer in the sunken area has failed, allowing water to spread underneath the flooring or into neighbouring rooms.
- Tiles are becoming loose or lifting from the surface: When water collects below the tiled surface, it starts affecting the tile adhesive. As the bond weakens, the tiles may begin to detach, shift, or sound hollow when walked on. In some cases, they may even pop up completely. This issue not only affects the look and usability of the space but also signals that water is actively moving beneath the surface.
- Mould or mildew growth due to trapped moisture: Trapped moisture creates the perfect condition for mould and mildew. These fungal growths often appear as black, green, or grey spots on walls, behind furniture, or in the corners of floors. Apart from being unsightly, mould can also trigger allergic reactions and breathing problems in sensitive individuals.
- Corrosion of reinforcement bars inside the slab: One of the most serious consequences of water seepage is when moisture reaches the steel reinforcement bars within the concrete slab. Prolonged exposure causes these bars to rust and expand. This expansion creates internal pressure, which leads to cracks in the concrete and weakens the slab structurally.
- Unpleasant odour from constant dampness: Another common but often overlooked sign of poor sunken waterproofing is a persistent, musty smell. This odour is caused by stagnant moisture and organic matter trapped under the flooring or within the walls. It doesn’t go away with surface cleaning because the source lies deeper inside the slab. This not only makes the space uncomfortable to use but also indicates hidden water damage that must be addressed.
All these signs point to a deeper problem in the slab. If ignored, these small issues can become harder and costlier to fix later. Using the right sunken waterproofing chemical and methods from the beginning helps avoid all of this.
Areas That Need Sunken Waterproofing Treatment
Sunken waterproofing is essential in any area where the slab is lowered below the main floor level to collect or redirect water. These spaces are frequently exposed to moisture and need careful treatment to avoid future problems. Key areas that require sunken area waterproofing include:
- Toilets and bathrooms, especially shower corners and wet zones.
- Utility rooms or wash areas where washing machines or basins are installed.
- Kitchens with concealed drainage systems.
- Balconies and terraces are designed with a drop-down floor.
- Planters' boxes or areas with built-in water features.
Each of these spaces must be treated with the right sunken waterproofing chemical and application method. Proper surface preparation, joint sealing, and use of quality waterproofing products are critical for effective long-term results.
Signs Your Sunken Area Needs Waterproofing
Waterproofing issues in sunken areas often start with small signs that gradually become more serious. Identifying these symptoms early can help prevent costly repairs later. Look out for the following signs:
- Damp patches or dark stains on walls and ceilings.
- Tiles are cracking or detaching from the floor.
- Hollow sounds when tapping tiles, indicating moisture underneath.
- Paint peeling off walls close to bathrooms or kitchens.
- A constant musty smell even after cleaning.
- Visible mould around skirting or floor joints.
These issues often suggest that the waterproofing in sunken slab has failed or is missing altogether. If any of these signs are noticed, it is advisable to consult a professional or use a waterproofing recommender to select the appropriate treatment.
How Berger Homeshield Waterproofing Experts Fix Sunken Area Dampness
Step 1: Repair Of Existing Construction
All cracks and unstable plasters are repaired using a repair mix (Polymer Modified Mortar) using Homeshield Latex Plus.
Step 2: Coving
In existing slab and parapet wall junctions, grooves are made for coving using a repair mix (Polymer Modified Mortar) using Homeshield Latex Plus.
Step 3: Water Outlet Treatment
Waterproofing systems (Homeshield Super Grout and Epibond) are applied on pipes and plumbing areas to take extra precautions from all water outlets.
Step 4: Waterproofing
Cementitious waterproofing treatment is applied (Homeshield Latex Shield 2K or Wall Shield 2K) with a proper roller or brush ensuring that all surface area of the concrete is covered.
This step helps avoid leakage and dampness issues for a longer time.
Step 5: Tiling, Grouting And Cleaning
Once the waterproofing treatment has completely dried, tiles are laid down using Tile Adhesive Plus evenly on the surface. After Tiles are installed Homeshield Epoxy Tile Grout is used to fill the spaces in between tiles.
Benefits Of Sunken Area Waterproofing:
- Prevents water seepage from walls and floor slabs to adjoining rooms.
- Keeps leakage prone areas like concrete water tanks, toilets, basements, bathrooms and kitchens damp-free for a long time.
- Increases the life and value of your house/building/office space.
- Ideal for repair of old concrete that is prone to dampness and leakage.
If you see signs of sunken area dampness, do not ignore them. Sunken slab dampness is a severe waterproofing concern and requires immediate attention and treatment.
Conclusion
Sunken waterproofing plays a vital role in maintaining the structural integrity and hygiene of residential and commercial spaces. Toilets, bathrooms, balconies, and utility areas are all highly exposed to water. Without proper sunken area waterproofing, these spaces can cause long-term damage to walls, slabs, and even the floor below.
Using the right waterproofing products and following the correct application process ensures that water does not penetrate the concrete or spread to other parts of the building. Whether it is bathroom sunken waterproofing or waterproofing in a sunken slab for a utility room, every detail matters.
With a professional approach and high-quality materials, toilet sunken waterproofing and other sunken waterproofing can protect your home or building for years to come. If you are unsure about the right solution, using a waterproofing recommender tool or consulting a trained expert is the best step forward.
check for any query you have about the blog
Frequently Asked Questions
A sunken area is a part of the floor that is built lower than the main floor level. It is commonly used in bathrooms and utility spaces to allow for easy water drainage.
The process involves cleaning the surface, applying a primer, using a sunken waterproofing chemical or membrane, sealing joints and pipe areas, and finally covering with a protective screed before tiling.
In most cases, proper waterproofing requires tile removal. Applying waterproofing over tiles is a temporary fix and may not last.
If done correctly with the right products, sunken waterproofing can last for many years, often matching the lifespan of the bathroom or structure, depending on usage and maintenance.